When I started my first blog, after purchasing the domain, I was frustrated because I don’t know how to point my domain to hosting. Even after reading some guides on the internet, I end up using a service. Later on, when I have to set up another of my blog and my clients’ sites, it becomes inconvenient and costly, so I decided to learn and do everything by myself. And turn out, it is not that difficult.
In this article, I will guide step by step on how to point a domain from Namecheap to Bluehost hosting in the most detailed and easiest way for all beginners and bloggers. I always prioritize choosing the hosting and domain providers that have a user-friendly interface and are easy to use. And Namecheap and Bluehost are 2 providers that I use for most of my websites. I choose Namecheap and Bluehost because of their affordable price, user-friendly interface, and effective 24/7 live support. And pointing a domain from Namecheap to Bluehost is extremely fast and easy.
If you haven’t bought a domain and hosting yet, please refer to my detailed guides on How to buy a domain from Namecheap and How to buy hosting from Bluehost. After that, you can follow step by steps listed below to point your domain to hosting.
Step 1: Get Nameserver from Bluehost
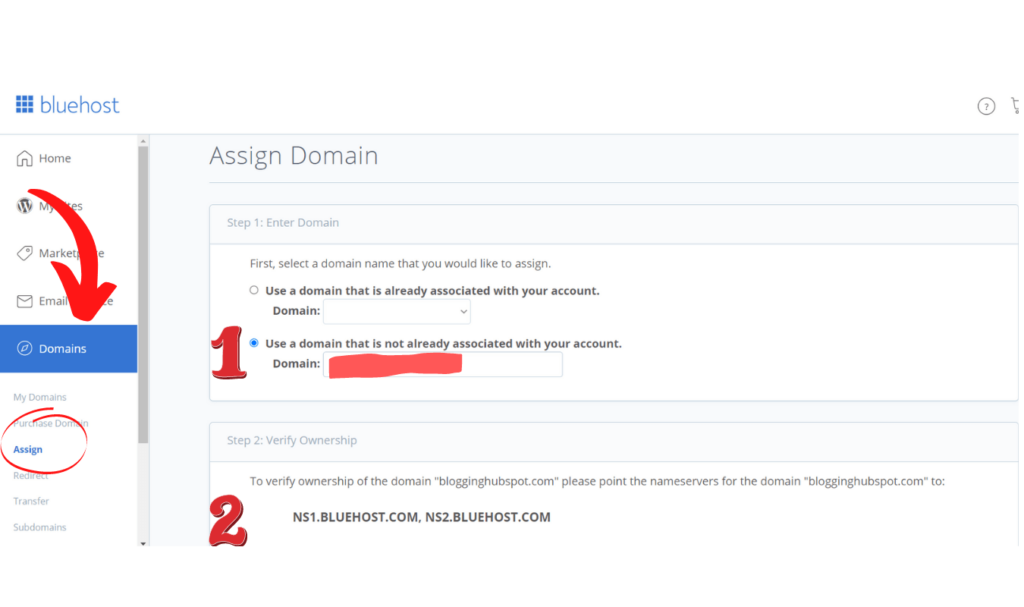
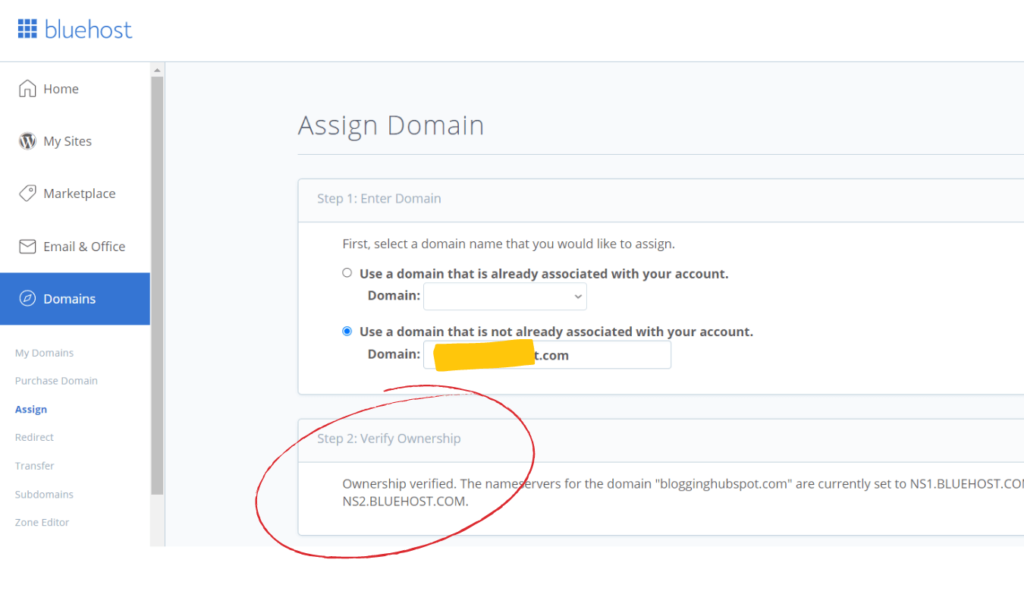
Log in to your Bluehost account. On the left sidebar, select Domains => Then select Assign.
In step1, you choose the second option: Use a domain that is not already associated with your account.
Type the domain name that you bought from Namecheap. You will be required to verify the account in step 2.
Copy these two codes to paste into Namecheap. Don’t close this window, just open a new window and log in to your Namecheap account.
Step 2: Paste Nameserver into Namecheap
Open a new window and log in to your Namecheap account. Choose Domain List on the left sidebar => Choose the domain that you want to connect with Bluehost => Click “Manage“.
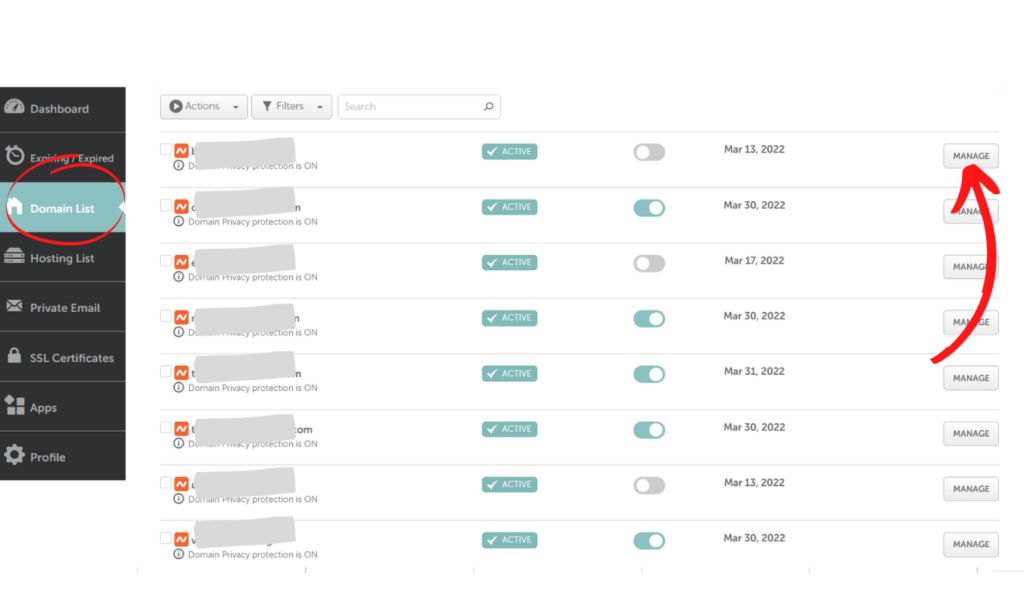
After you click Manage, you will see a screen like the one below.
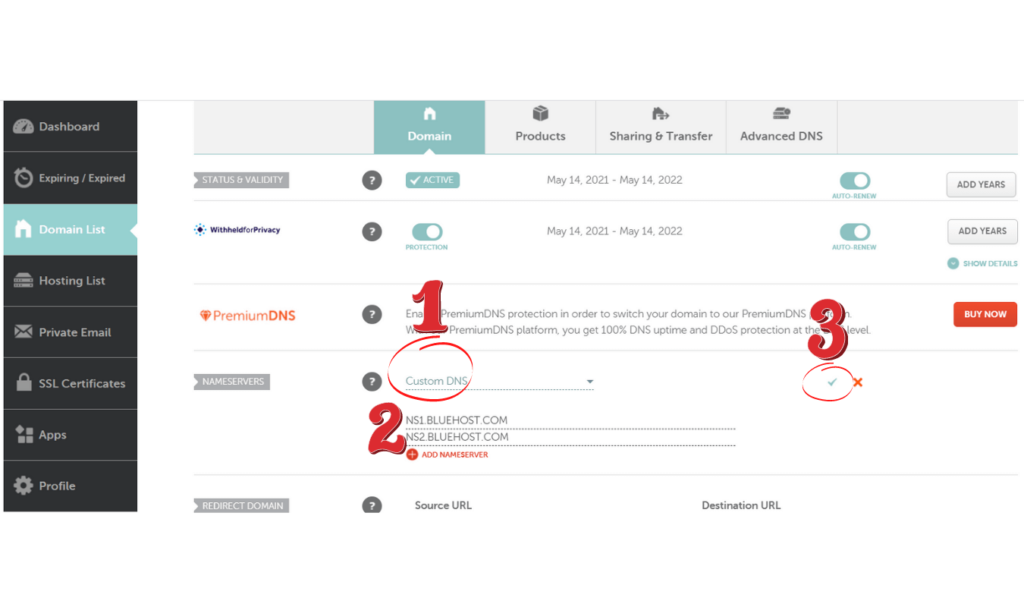
In the NameServers section => Choose Custom DNS => Paste the 2 hosting codes that you copy from Bluehost and paste here=> Then click the green tick above to save it. (number 3 as shown in the picture).
Step 3: Addon domain at Bluehost
After you have pasted the Nameserver, return to the Bluehost window. Now, Bluehost will show “Ownership verified“. If you don’t see it displayed as shown below, please F5/refresh the page and then re-enter the domain name.
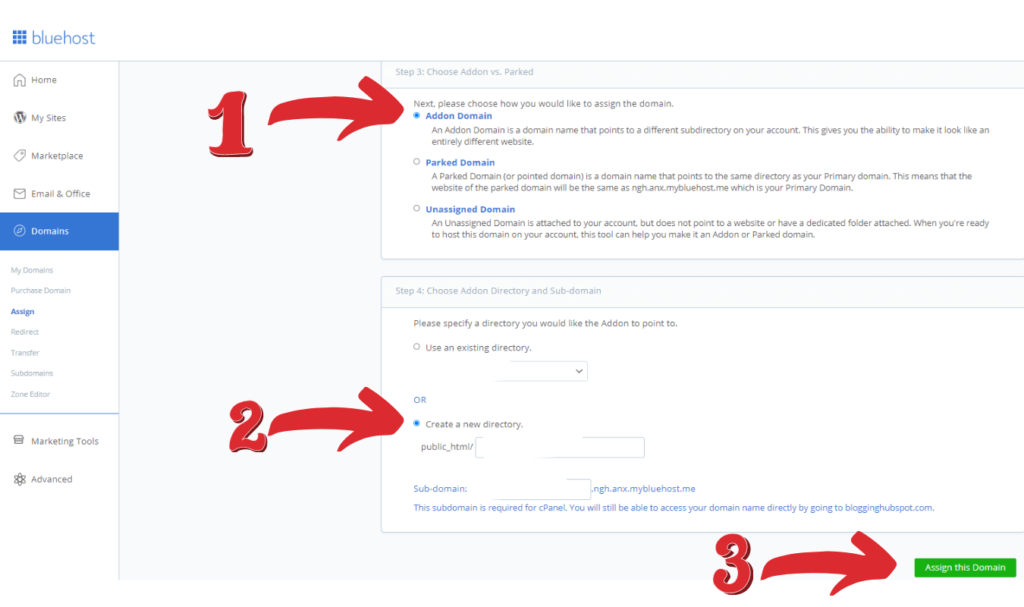
In Step 4, you choose Addon Domain. Addon domain is my prefer one because the domain will point to a different subcategory on the account which is easier for me to manage.
In Step 5, you choose to Create a new directory => the system will automatically fill in your domain name => And select Assign This Domain.
After assigning the domain, the list of your domains in Bluehost will appear in the below picture with all of the related information like expired date, and domain type.
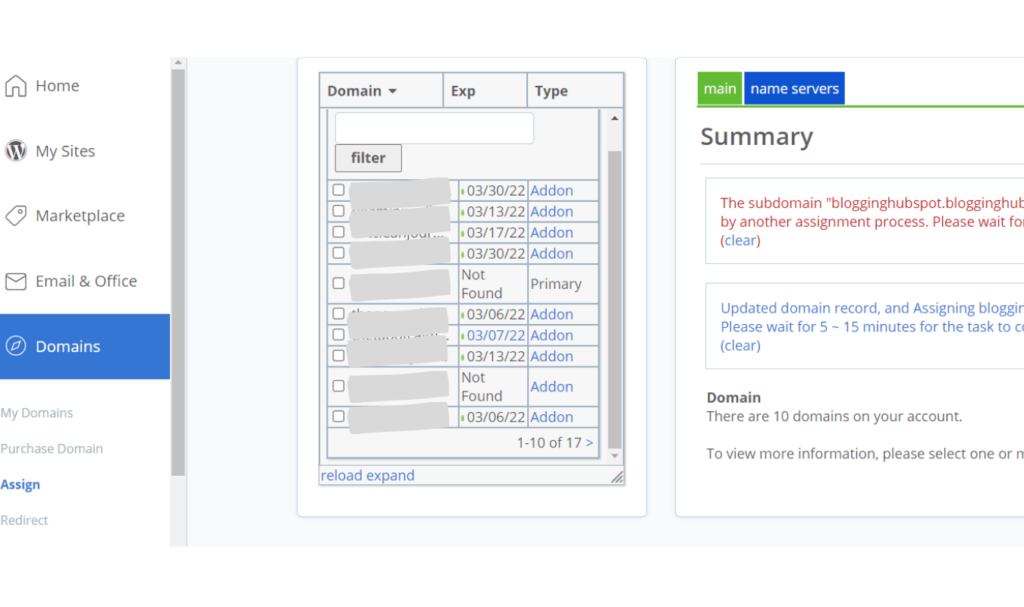
And yeah! You have successfully already pointed the domain from Namecheap to Bluehost. One more step and you will have your very first website, connect your site to WordPress.
Connect Your Website To WordPress In Bluehost
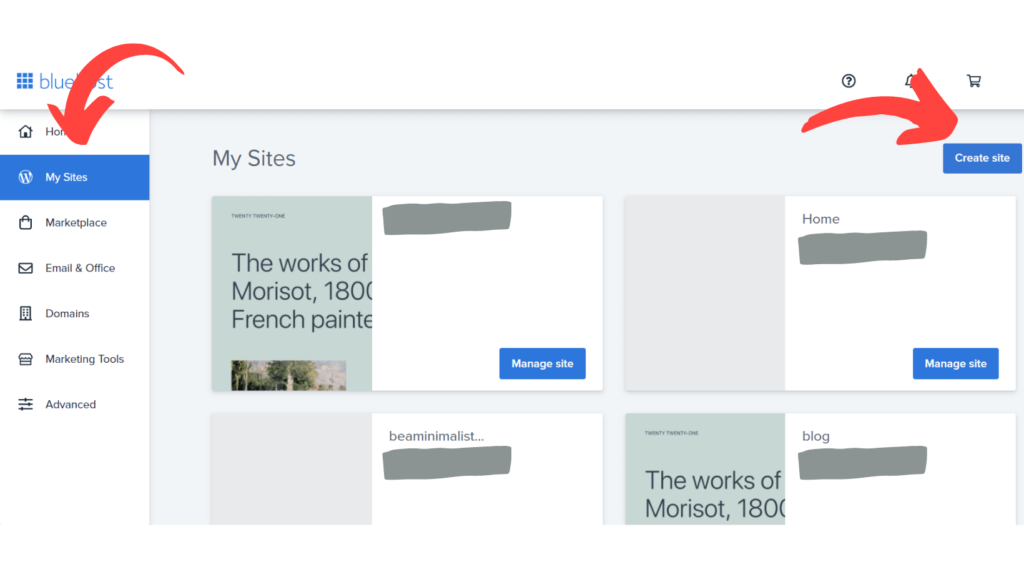
Step 1: My Sites => Create Site:
You select “My Sites” on the left side bar => Select “ Create Site ” in the upper right corner.
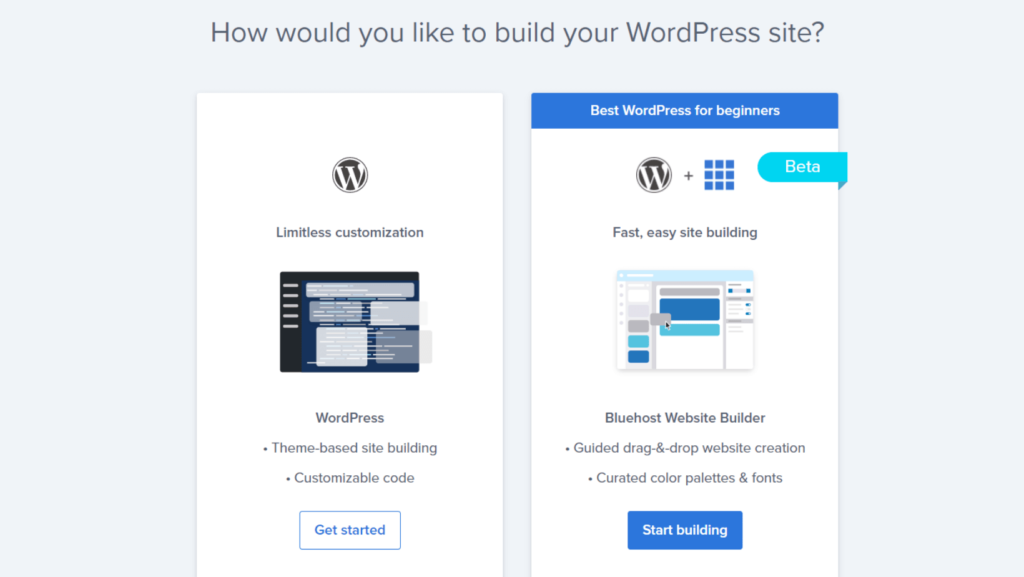
Step 2: Select WordPress => Get Started
Normally, I will choose the first column “WordPress”. For Bluehost beta, Bluehost will guide you step by step to the setup of your website in the admin panel. Since I work with the WP admin panel a lot, I don’t need to use this beta panel. I will select the first column as WordPress and click “get started”
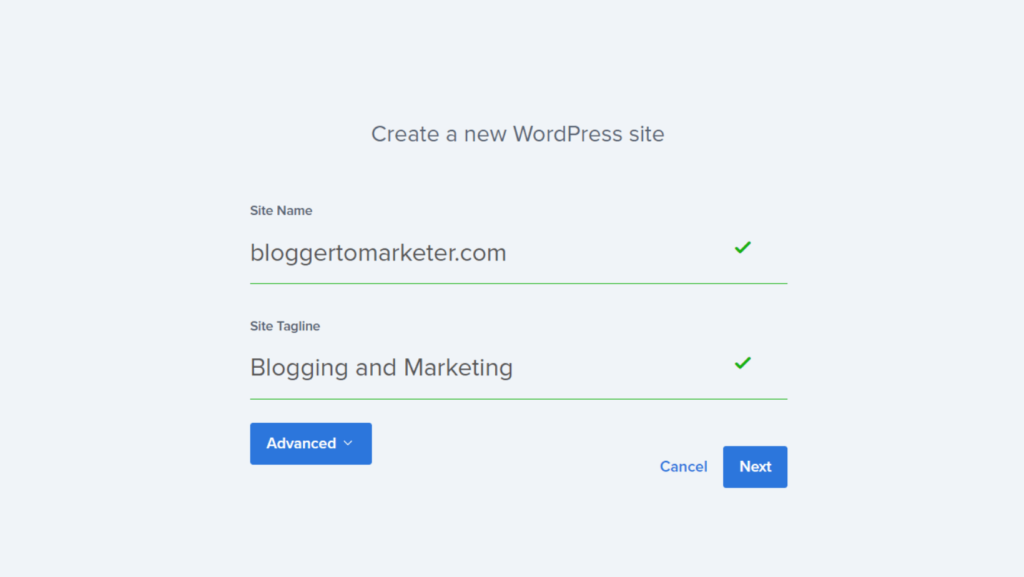
Step 3: Fill in Domain and Tagline
Enter your website name and enter the Site Tagline. A tagline is a brief introduction to your website that can include your website’s main keyword. This Tagline section you can edit later on the WordPress admin panel.
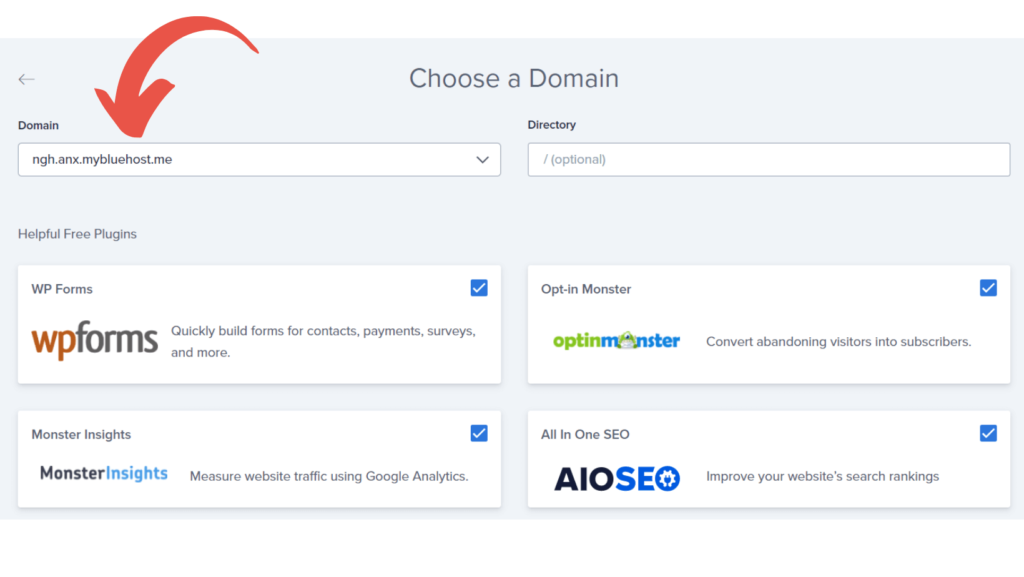
Step 4: Select Domain
You click on Domain on the left and choose the correct domain that you entered in step 3. You can leave the directory section blank => and then select “Next” at the bottom right.
After installing step 4, the screen will display a message that WordPress has been installed. And yeah, you finally have your first blog.
You can select “Login to WordPress” to go directly to the WordPress admin panel to start your first blog.
If you have not installed it or do not want to install it yourself, you can ask the Bluehost support team to install it for you which will take only 2-3 minutes.
Bluehost Live Chat User Guide
Step 1: Go to Bluehost. Click on the word “Chat” in the upper right corner,
Step 2: Enter your name, and select support type (chat, email, phone). Enter your domain name => Select Next
Step 3: Select topic (your issue), choose description, and explain more detail. Just make it quick and short to enter the chat room, in the chat room you have to describe your issue again, so don’t waste to much time in this step.
Step 4: Select Find Help => then continue to select Start Chat
Step 5: Once you enter the chat room, you only need to wait for 1 -3 seconds, there will be somebody joining the room. You will be asked to share your domain or email. A token code will be sent to your email. Check your inbox and copy that token and paste it into the chat box to verify your account. After that, you can describe your issue in detail to get the fastest support.
If you find the article useful, don’t forget to comment and share. Wish you a wonderful blogging journey!
Hello and welcome to my creative space. I’m Mai! I am thrilled to have you visiting my blog. Wishing you all the best with your first website and your blogging journey. If my piece of writing is useful to you, you can invite me a coffee at beacons.ai/maivan. Lots of thanks!!


What do you think?